Learning to play guitar is a fun and rewarding hobby, but it can be frustrating when you’re just starting. Whether you’re taking lessons or are entirely self-taught, there are common pitfalls that almost all guitar students encounter along the way. Here’s ten tips to help improve your guitar playing skills today:
1. Posture
Believe it or not, playing guitar is a whole body experience. It’s easy to forget this, since all the action happens with our hands. But in order to set yourself up for success, you’ll want to take a look at your posture. Oftentimes, guitarists are hunched over their instrument. Shoulders are tense. And the guitar seems to be sliding away. Here’s how to fix it: sit upright at the edge of your chair. Feet flat on the ground. Shoulders dropped. Keep the guitar into your body with the neck at a slight upward angle. Let your left (fretting) arm hang freely and bring your hand up to the instrument, pivoting at your elbow. It’s super helpful to practice in front of a mirror.

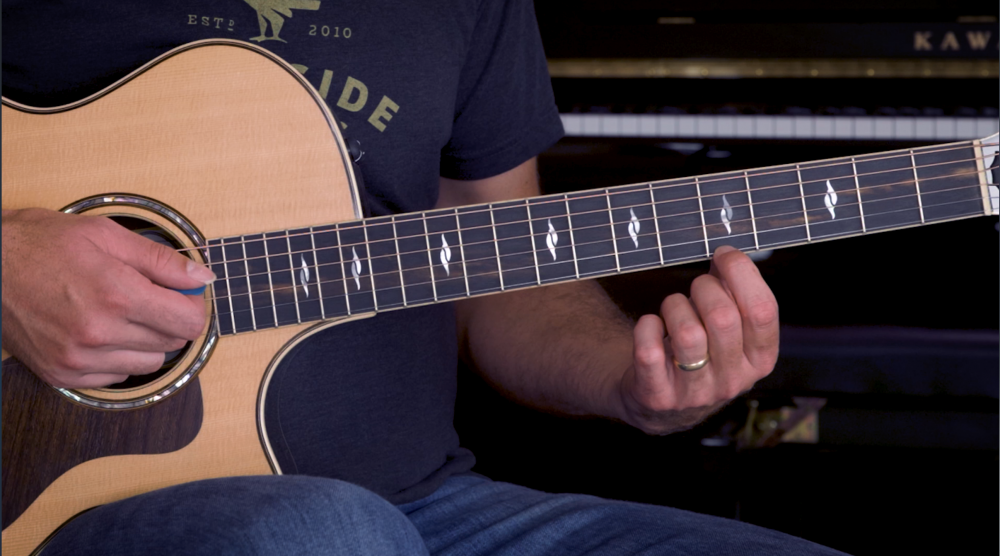
2. Playing on Fingertips
In order to get a clean sound you need to play on your fingertips, just behind the fret. This will help you get the ideal pressure when pressing the string against the fret. Also, when playing chords, it’s common for the notes to sound buzzy or muted. This is due to fingers accidentally touching the wrong strings. By playing on fingertips you’ll ensure a small focused contact point between finger and string.
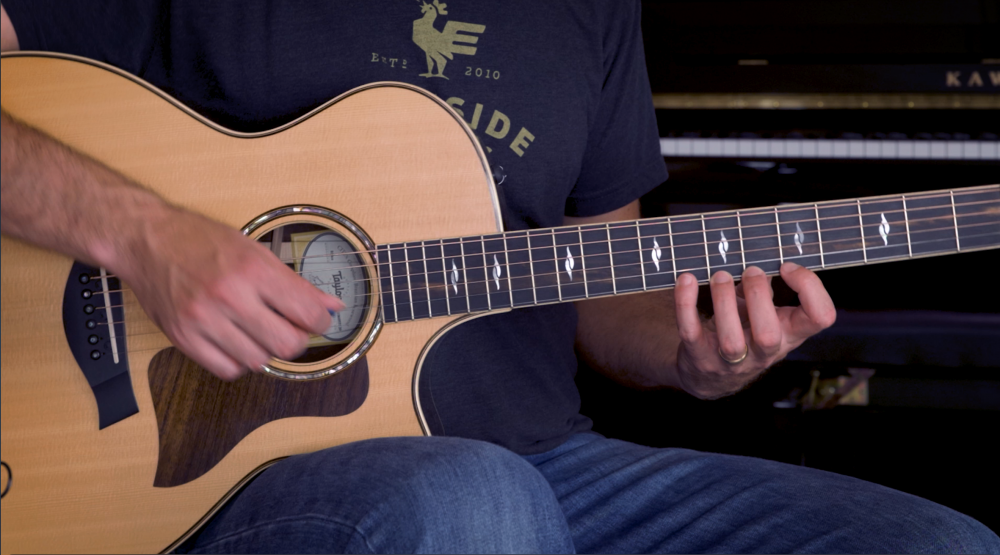
3. Thumb / Wrist Placement
You want your thumb to press into the back of the guitar neck approximately between where your index and middle fingers press into the fretboard. This will help create a counterforce and take some of the pressure off of your fingers as they press into the strings. As your fingers move across the fretboard, your thumb should move in the same direction. By placing the thumb on the neck, you’ll be able to keep a straight wrist, which is ergonomically better for your wrist.

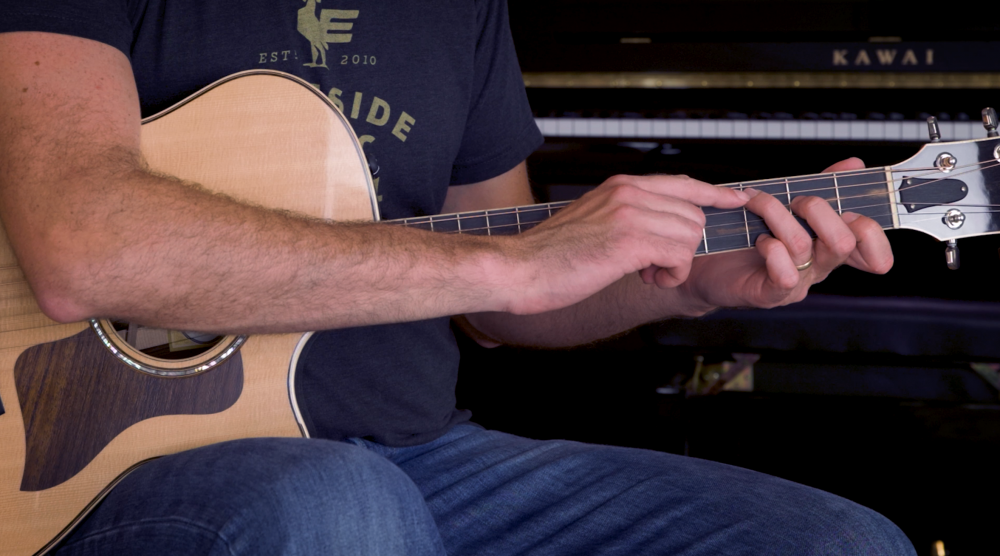
4. Don’t choke the neck
Ease up on your grip. This can seem counterintuitive to beginners because when you’re just starting out you need to apply an insane amount of pressure to get a proper sound out of the guitar. But as you technique develops, you’ll find the sweet spot of how to get a sound without so much effort. Here’s an easy way to dial in the correct pressure. Start by pressing a finger into the fretboard with the normal amount of pressure you’d apply. Gradually release the pressure as you pick the string until the note starts to buzz. Notice what it feels like to get a clean sound with the minimal amount of pressure. This is your target. Try this same exercise with chords
5. Keep your fingers down – legato playing.
Smooth, connected “legato” playing can be a real challenge on the guitar. Each time you pick a note you’re effectively deadening the previous note. Unlike singing, or playing a wind instrument, you can’t play a phrase or stream of notes in a single breath. To address this, you want to make sure each note is ringing for the full duration. You’ll want to keep your fingers down as you play a scale or phrase and lift only after the subsequent note is produced or when you’re switching strings. You can also work to achieve a smooth legato sound by incorporating hammer ons and pull offs into your phrasing. These are often called slurs.
6. Alternate Picking –
Alternate picking means picking in both directions (down and up). Often beginning guitarists will only pick in one direction (usually down). Not only is this wasted energy (since you’re bringing the pick up each time anyway) it misses a key opportunity to pick with the beat. With alternate picking you want the down picks to line up with down beats and up picks to match up beats. Of course there are situations where you may want to only pick in one direction, but it’s a good idea to master alternate picking as a default.

7. Open strings
Unintended ringing of open strings is the bain of beginning guitarists who’re learning to play chords. Especially on electric guitar, where even brushing an open string can cause unintended sounds. This brings up a key point in learning to play guitar. It’s not only about getting the correct strings to ring beautifully, you also need to prevent the wrong strings from ringing out. To do this involves a combination of accuracy in your picking hand (don’t pick the wrong string!) and creative muting in your fretting hand. I tend to use the tips of my fingers to mute low strings and the inside of my fingers (near the palm) to mute high strings. Depending on the chord or riff, I may use my thumb to mute the low E string. While this isn’t strictly “good” technique, it can be effective in muting unwanted sounds.
8. Switching between chords
Switching between chords is especially challenging when you’re just learning to play chords. The key here is to look for common tones between chords and keep those fingers down while switching between chords. Think of pivoting around the common tone finger. This minimized the energy and time spent finding the next chord. It also helps keep you oriented on the fretboard (as opposed to taking all fingers off and starting from scratch with each chord)

9. Strumming on the beat (strum patterns) –
Strum patterns can be deceptively tricky. The key is to strum in the same direction as the beat (just like with alternate picking). If you watch any of your favorite rhythm guitarists’ right hand, you’ll notice that the hand is constantly moving down and up, even if they’re not strumming on every subdivision of the beat. This approach helps you feel an intuitive sense of the rhythm, rather than simply copying what you hear. Especially with syncopated rhythms (where the downbeat isn’t always played) it can be tricky to get the strum direction correct.

10. Playing in time –
This is a big one and unfortunately there’s no shortcuts to playing in time. Developing a sense of rhythm takes patience and a lot of practice. Here are a few tips for playing in time:
- Play with people who have a great sense of time.
- Play with a metronome.
- Play along with your favorite recordings
- Simplify the strum pattern – commit to landing on the downbeat of each measure, even if that means strumming just once per measure
- play open strings on the last upbeat of each measure (switching between chords while you keep strumming)
- Build the chord “as you go” for arppegiated (picked) patterns. There’s no need to grab the complete chord all at once. Simply be sure to have your fingers go down in the order you pick each note.
- Practice practice practice!

11. Slow Down
Practicing too fast is a common pitfall that we all encounter, whether we’re just starting out or are a seasoned professional. It’s tempting to dive right into a new song or lick and try to play up to tempo, but the key to learning a new skill is to slow down. Find a tempo where you can really nail the concept, then gradually increase the tempo as you practice. A metronome is a great tool for incremental increases in tempo. The trick is to start slow and gradually increase 3 to 5 clicks at a time until you reach your ideal tempo.